

Photoshop Tutorial: iPod Commercials/ Pen Tool
Alright GSB this is my 3rd photoshop tutorials and I hope it helps a little.
Okay, so let's get quickly started, open a file(photo) you wish to make iPodish:
File > Open...

Then locate the photo on your computer.
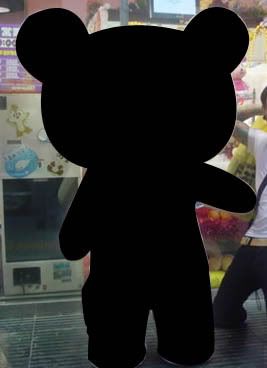
In this occasion I chose a picture of Jeph, and his giant teddy bear friend.

Alright now let's make a new layer that we are going to be working one.
to make a new layer:
Layer > New > Layer...
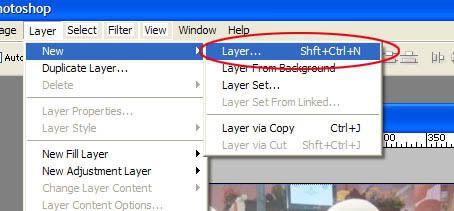
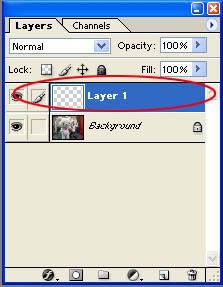
If you did it right the new layer should be on your layer menu,
and if your layer menu isn't showing then get it out there by:
Window > Layers
Alright we got all the prep done.
(Yippeee)
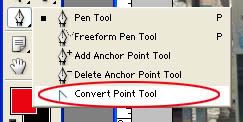
Alright now click the Pen Tool

If you don't see that tool there and you see one of these:
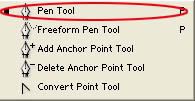
Right click on it and click the top on that's labeled Pen Tool.
Okay, FYI this is where it's going to start getting hard.
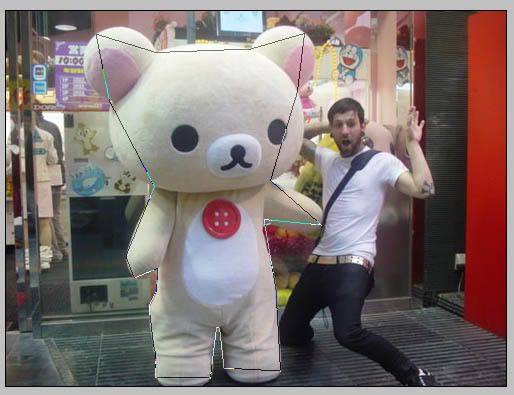
I've decided to outline the bear and not Jeph because that'll take longer.
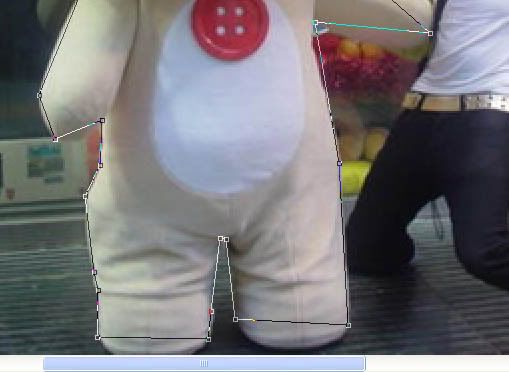
Now select the Pen Tool and start clicking at all the main indents and curves of the image until you get back to the dot where you started so that the line is outclosed.
That probably didn't make much sense but look at the bear:
Okay once you get that done, it gets really tricky from here.
Select the Convert Point Tool or the Convert Anchor Tool as it's sometimes called:
Now when you do this part I suggest that you zoom in very closely on what you're doing.
Click a corner so you see all the dots you selected come up.
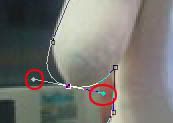
Now with the Convert Point Tool click a dot and drag a little away and you see the straight lines bend a little:

and you should also see the wings that you have made:
Each wing bends that side of the curve, for example if I pull the left wing further left this is what happens:
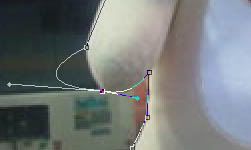
and if I push it toward the right this is what happens:
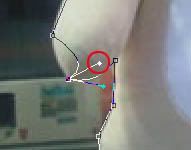
Alright now you have to adjust the wings off all the dots you made with the Pen Tool so that they outline the object.
So that it looks like this:

Okay, so we got past the hard part, it takes a little time to get used to the Convert Point Tool so don't be discouraged if you don't get it the first time.
Before we fill in the outline make sure you are on the right color by looking at the color boxes.
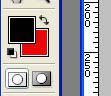
Mine's black because I want the fill to be black.
NOW, to fill in the outline with black or whatever color you:
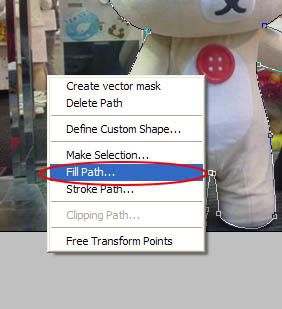
Then click OK

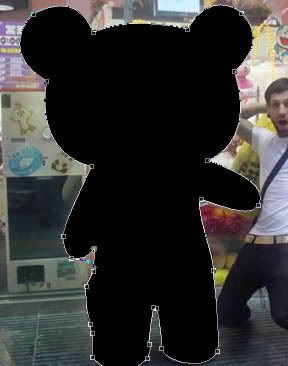
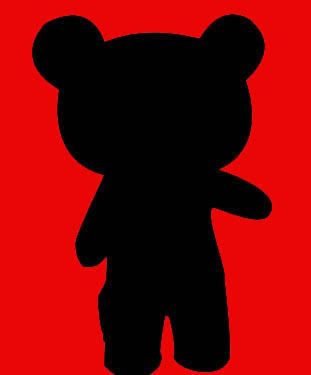
and this is what it should look like:
To get rid of the outline but not the fill you:
right click on the picture > delete path
ALMOST DONE!
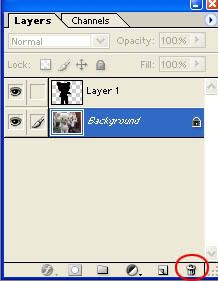
Now to delete the background picture select it then click the trashcan.
So now you have no background behind your image, so you can just get the paint can and fill it in, or make a new layer and fill that in.
AND YOU'RE DONE!
This is what mine came out as:

If you need anymore help PM me
-Lina
Okay, so let's get quickly started, open a file(photo) you wish to make iPodish:
File > Open...
Then locate the photo on your computer.
In this occasion I chose a picture of Jeph, and his giant teddy bear friend.
Alright now let's make a new layer that we are going to be working one.
to make a new layer:
Layer > New > Layer...
If you did it right the new layer should be on your layer menu,
and if your layer menu isn't showing then get it out there by:
Window > Layers
Alright we got all the prep done.
(Yippeee)
Alright now click the Pen Tool
If you don't see that tool there and you see one of these:
Right click on it and click the top on that's labeled Pen Tool.
Okay, FYI this is where it's going to start getting hard.
I've decided to outline the bear and not Jeph because that'll take longer.
Now select the Pen Tool and start clicking at all the main indents and curves of the image until you get back to the dot where you started so that the line is outclosed.
That probably didn't make much sense but look at the bear:
Okay once you get that done, it gets really tricky from here.
Select the Convert Point Tool or the Convert Anchor Tool as it's sometimes called:
Now when you do this part I suggest that you zoom in very closely on what you're doing.
Click a corner so you see all the dots you selected come up.
Now with the Convert Point Tool click a dot and drag a little away and you see the straight lines bend a little:
and you should also see the wings that you have made:
Each wing bends that side of the curve, for example if I pull the left wing further left this is what happens:
and if I push it toward the right this is what happens:
Alright now you have to adjust the wings off all the dots you made with the Pen Tool so that they outline the object.
So that it looks like this:
Okay, so we got past the hard part, it takes a little time to get used to the Convert Point Tool so don't be discouraged if you don't get it the first time.
Before we fill in the outline make sure you are on the right color by looking at the color boxes.
Mine's black because I want the fill to be black.
NOW, to fill in the outline with black or whatever color you:
Then click OK
and this is what it should look like:
To get rid of the outline but not the fill you:
right click on the picture > delete path
ALMOST DONE!
Now to delete the background picture select it then click the trashcan.
So now you have no background behind your image, so you can just get the paint can and fill it in, or make a new layer and fill that in.
AND YOU'RE DONE!
This is what mine came out as:
If you need anymore help PM me
-Lina


I have the lasso tool but the thing is you have to have a really steady hand to do it.
Which I do not.
So I find this easier because all I have to do is make dots around the outside and adjust then.
Yeah thats me..., October 14th, 2008 at 02:55:55pm
idk what version of photoshop you have, but another way to cut out the bear would be using the lasso tool. it automatically latches on to the sides of the object and you can cut it out easily. i've actually never seen it done this way.
but thats pretty cool!
suburban.zombie, October 14th, 2008 at 12:35:11pm
LINA I LOVE YOU AND THIS IS AMAZING.
JEW., October 13th, 2008 at 10:49:56am
your way of using the pen tool is really dodgy and doesn't turn out as good as it could be.
sorryy x]
The Doctor., October 12th, 2008 at 04:30:26pm
I love this picture!
It's my wallpaper!
Yeah thats me..., October 12th, 2008 at 03:11:33pm
Wtf, Lina, could you have gotten a more awkward picture?
lmfao
Too bad I don't have photochop.
I'll search through the GIMP and see if I can still follow this thing though.
captain america, October 12th, 2008 at 03:05:24pm